Flat, Damp and Full of Surprises: A UK Guide to Ply, MDF and Chipboard
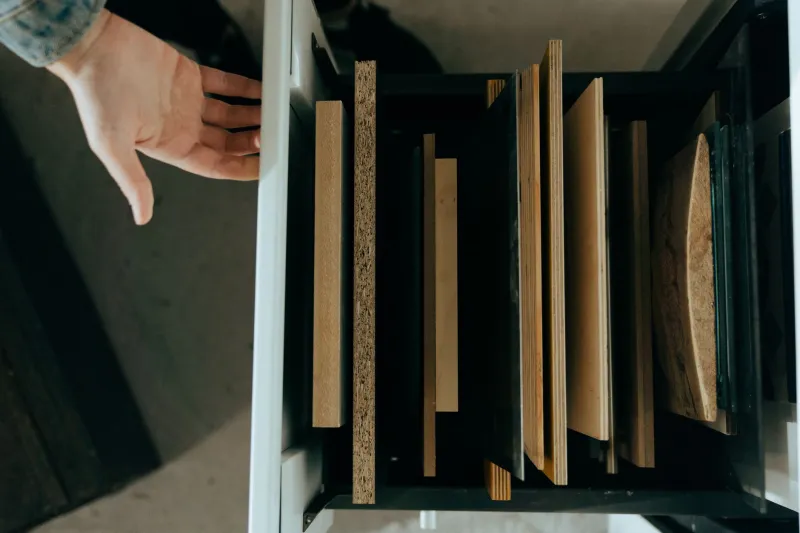
Sheet materials are the quiet workhorses of home woodworking. They make shelves, jigs, cabinets, workshop fixtures and the sort of utility furniture that actually earns its keep. But walk into a UK timber merchant or DIY shed and you are faced with a wall of boards that look similar and behave very differently. Ply, MDF and chipboard are not interchangeable. Choose the wrong one and you will get swelling, sagging or a surprise in six months.
Here is a practical guide for British homes and small workshops—where damp is common, space is tight and every sheet has to justify its place.
Start with the job, not the board
Before you buy, ask what the board has to do. A shelf in a warm living room is a different job from a jig in a cold shed. A cabinet carcass in a kitchen is different from a workshop trolley that might get rained on. Write down the span, the load, the damp risk and whether it will be painted, veneered or left bare. That will narrow the choice fast.
As a rough rule: plywood is the dependable all-rounder, MDF is the smooth painter's friend, and chipboard is the budget option for dry, utility jobs. Veneered boards are for furniture where looks matter. But the details matter more than the labels.
Plywood: read the label and check the edges
Plywood is made from thin veneers glued in alternating layers. Good ply is strong, stable and takes screws well at the edges—within reason. Bad ply is full of voids, warps in the rack and delaminates when it gets damp.
Look for EN 636 markings. EN 636-2 is for humid conditions; EN 636-3 is exterior-grade. For a shed or kitchen, do not accept a vague 'waterproof ply' claim. Birch ply is lovely for jigs and furniture, but it is expensive; poplar-core ply is cheaper and fine for painted work or utility shelves. Hardwood-faced ply can look good with a clear finish, but the face veneer is thin, so sand carefully.
In the yard, check a cut edge for voids and glue lines. Look for face veneer that is lifting, dark damp stains or a sheet that rocks on the stack. A good merchant will let you inspect. If the stack is stored on edge in a leaky shed, walk away.
Use 18mm ply for shelves up to about 800mm span; go thicker or add a lipping for longer spans. Use 12mm birch ply for jigs and templates. Seal cut edges with primer or edge banding, especially in damp rooms.
MDF: smooth, stable and thirsty
MDF is made from fine wood fibres and resin. It is uniform, easy to machine and takes paint beautifully. Standard MDF is not moisture-resistant. Moisture-resistant MDF—often called MR MDF, with a green core—is better for kitchens and bathrooms, but it is not waterproof. It will still swell if water sits on an unsealed edge.
MR MDF is excellent for painted cabinet doors, jigs and templates. Veneered MDF is a good choice for furniture where you want a real wood face without the cost of solid timber. But MDF dust is nasty: cut it outside or with extraction, and wear a proper mask. Seal all faces and edges with a water-based primer before painting. Do not leave cut edges raw in a damp shed.
For shelves, 18mm MDF is fine up to about 700mm span if well supported. For longer spans, add a hardwood lipping or use ply. MDF sags more than ply under load, so be honest about the books.
Chipboard: cheap, cheerful and easy to misuse
Chipboard is made from wood chips and resin. It is cheap, flat and widely available, often with a melamine face. Standard chipboard is for dry, utility use. Moisture-resistant chipboard—usually green—is better in kitchens and utility rooms, but it is not a substitute for ply in a damp workshop.
Chipboard edges crumble, so they need support or edging. It sags more than ply or MDF, so keep shelf spans short—600mm or less unless you add a stiffener. Melamine-faced chipboard is great for cheap cupboard carcasses, workshop cabinets and utility shelving where looks are not the priority. Do not use it for a child's stool or anything that might get wet.
When buying, check that the board is flat and the faces are not chipped. Look at the edges: if they are swollen or crumbly, the sheet has had a hard life. Store it flat and dry.
Veneered boards and melamine: the show-off options
Veneered MDF and veneered ply give you a real wood surface with the stability of a manufactured board. They are ideal for furniture, built-in cupboards and speaker cabinets. The veneer is thin—usually 0.6mm or less—so do not sand through it. Use a sharp blade, score the cut line and support both sides.
Melamine-faced chipboard and MDF are practical for utility furniture. The surface is hard-wearing and easy to clean, but the edges need banding. Iron-on edge banding is fine for home projects; trim it with a sharp chisel or trimmer. Seal the cut edges underneath, especially in kitchens.
How to spot a good sheet in the yard
Check for flatness first. Sight along the sheet or lay it on a known flat surface. A gentle bow might flatten when fixed; a twist will fight you forever. Look for damp stains, swollen edges, delamination, chipped faces and voids on cut edges. Ask how the sheets are stored. If they are leaning against a damp wall or sitting on a concrete floor, they may already be compromised.
If you are buying from a DIY shed, go early in the day when the stack is tidy and staff can help. Many sheds offer a cutting service; it is worth paying a small fee to get sheets down to car-friendly sizes. Local timber merchants often have better quality and will cut more accurately.
Storage and damp: the British problem
Sheet goods hate damp. Store them flat on dry battens, not directly on a concrete floor. Keep them off the wall and allow air to circulate. In a small shed, a wall rack with several supports is better than leaning sheets in a corner. Bring boards into the room where they will be used for at least 48 hours before cutting, so they can acclimatise.
Seal cut edges on shelves, cabinets and jigs. A coat of primer or a PVA mix on ply and MDF edges will slow moisture uptake. It is not a waterproofing system, but it helps.
Cutting and edging cleanly
Support both sides of the cut to avoid breakout. Use a sharp fine-tooth blade for ply and chipboard; score melamine first and apply masking tape to reduce chipping. For MDF, use a sharp blade and do not linger—burning the edge makes it harder to finish. Clean up edges with a sanding block; for ply, a block plane can work if you go gently.
Edge banding or lipping makes a huge difference. Iron-on banding is quick for melamine and veneered boards. For ply and MDF, glue on a thin hardwood lipping and flush it with a flush-trim bit or a sharp plane. Seal the edges afterwards.
Match the board to the job without overspending
For shelves: 18mm ply or MR MDF for painted shelves; 18mm veneered MDF for visible furniture; chipboard only for short, dry utility spans. For jigs: 12mm birch ply or MR MDF. For cabinets: 18mm MR MDF, veneered MDF or melamine-faced chipboard, depending on budget and damp risk. For workshop fixtures: 18mm ply for strength; chipboard is fine in a dry shop if you brace it. For anything that might get wet: exterior-grade ply or a sealed, suitable board—not standard MDF or chipboard.
Do not buy birch ply for a jig that will live under a bench, and do not buy cheap chipboard for a bookshelf in a damp spare room. Spend where the board will be seen or will carry load; save where it will be painted or hidden. That is how you avoid both swelling and overspending.